Most buyers never see the inside of the factory that makes their products. They receive a container, unpack the shutters, and hope the quality matches the samples. We think that's a problem — and this article is our attempt to fix it.
We're Bright Shutters, a plantation shutter manufacturer based in China with over 15 years of experience supplying distributors in Australia, New Zealand, and North America. Our 65,000 sqm facility runs 12 dedicated production lines and ships more than 500,000 shutter panels annually to wholesale customers who rely on us for consistent quality and on-time delivery.
In this article, we'll walk you through exactly how a plantation shutter is made — from the timber arriving at our gate to the finished product loaded into your container. No stock photos. No vague descriptions. Just our actual production process, with real numbers.
Step 1: Timber Selection and Incoming Inspection
Not all timber is equal. The species you choose determines everything that follows — weight, stability, paint adhesion, and long-term performance in humidity-prone environments like Australian coastal homes.
At our factory, we work with three primary timber species for solid wood shutters:
Basswood (Tilia) — Our most popular choice for premium shutters. Lightweight, tight-grained, and exceptional at holding paint. It's the benchmark material for the Australian and North American markets.
Paulownia — Ultra-lightweight and naturally resistant to warping, making it ideal for oversized panels and humid climates. Increasingly popular for Queensland and coastal WA distributors.
PVC — For bathroom, laundry, and coastal applications, our high-density PVC shutters are engineered to never warp, swell, or yellow — backed by a lifetime structural warranty.
When a timber delivery arrives, it does not go directly into production. Our incoming quality control team (IQC) checks every batch against three mandatory criteria:
- Moisture content: We require ≤8% moisture content before timber enters the production line. Excess moisture is the leading cause of warping after installation — we reject any batch that exceeds this threshold.
- Dimensional tolerance: Every piece is checked against our spec tolerance of ±0.3mm.
- Surface defects: Knots, cracks, and discolouration are flagged and removed from shutter-grade production. Rejected timber is redirected to non-structural applications.
Only timber that clears all three checks advances to the next stage. In 2024, our IQC rejection rate averaged 4.2% — which tells you we are genuinely enforcing this standard, not just documenting it.
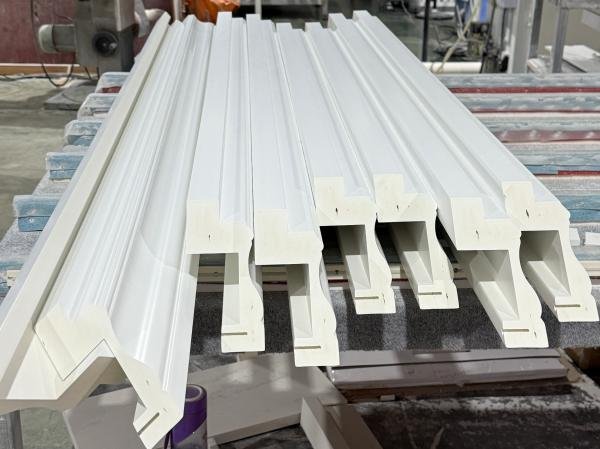
Step 2: CNC Milling and Profile Shaping
This is where raw timber becomes a louvre blade.
Our CNC milling line runs 32 machines simultaneously, each programmed to cut louvre profiles to a dimensional tolerance of ±0.2mm. The profile — the curved cross-section you see when you look at a blade end-on — is what gives a plantation shutter its clean, architectural appearance.
Three things worth knowing about this stage:
Every routing pass is computer-controlled. There is no operator hand-guidance on our CNC line. Each pass follows an exact digital path, which is why louvres look identical from panel one to panel five hundred in a single production run — no fatigue, no drift.
We grind our own tooling in-house. Rather than using off-the-shelf router bits, we manufacture our own cutting profiles. This gives us the ability to reverse-engineer and replicate any discontinued moulding profile within 3 to 7 days — a capability we use regularly when distributors lose a supplier and need continuity.
Standard louvre widths: 47mm, 63mm, 76mm, and 89mm as our core range, with custom widths available. For the Australian market, 63mm and 89mm account for approximately 78% of our export volume.
After milling, each batch goes through a sanding station — 150 grit rough sand followed by 220 grit finish sand — before moving to assembly.
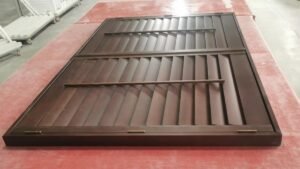
Step 3: Frame Assembly and Panel Construction
Individual louvres become a shutter panel in our assembly hall, where 120 skilled operators work across two shifts.
Frame construction comes first. The outer frame — stiles (vertical members) and rails (horizontal top and bottom) — is cut from the same timber batch as the louvres, ensuring consistent colour and grain across the whole panel. Corners are joined using mortise-and-tenon joints on panels above 900mm height, and dowel joints on smaller panels.
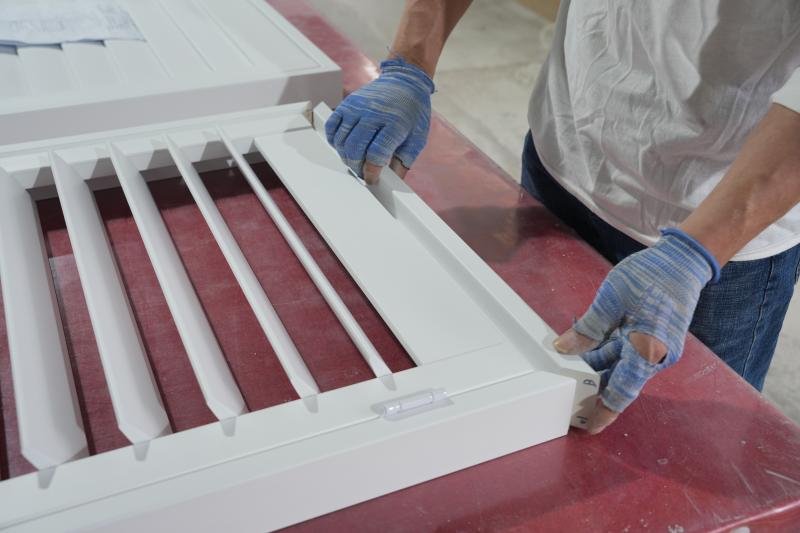
Louvres are installed to a specified pitch using a jig fixture. The tilt rod runs through each louvre via a precision-drilled hole. Every hole is drilled on the same jig, which means every louvre in the panel sits at identical pitch — a detail that becomes obvious when you hold a panel up to the light and look across the blades. Uneven pitch is one of the most common quality failures in budget-grade shutters.
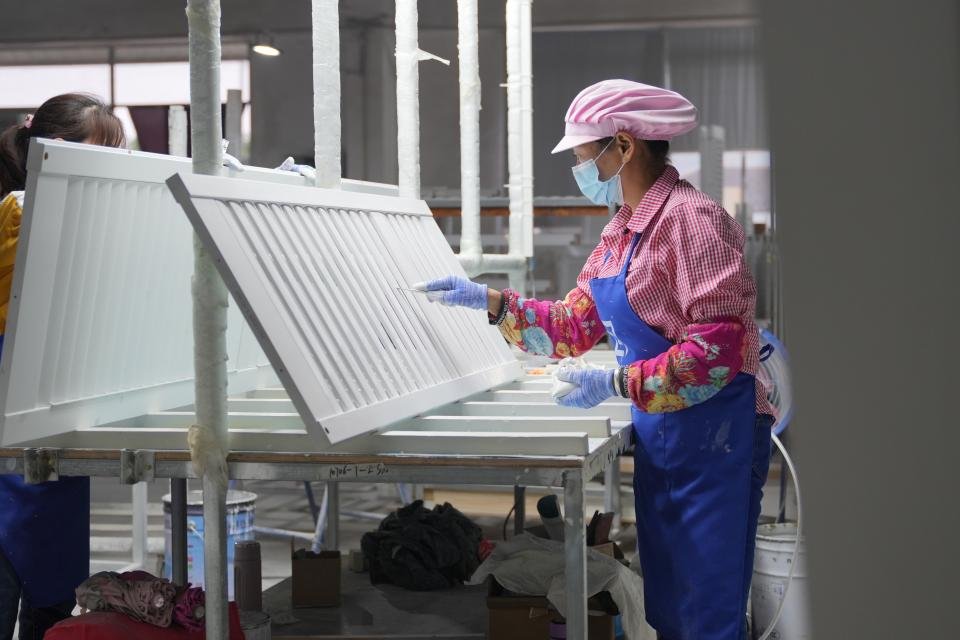
Hardware is fitted before finishing, not after. We fit hinges, louvre pins, and the tilt mechanism at assembly — before the panel enters the paint line. This is an important sequence decision: factories that fit hardware post-painting risk chipping the finish at every fixing point. We don't have that problem.
Each assembled panel is checked for louvre alignment, tilt rod operation (full 170° rotation without binding), and frame squareness (diagonal tolerance ≤1.5mm) before it moves to finishing.
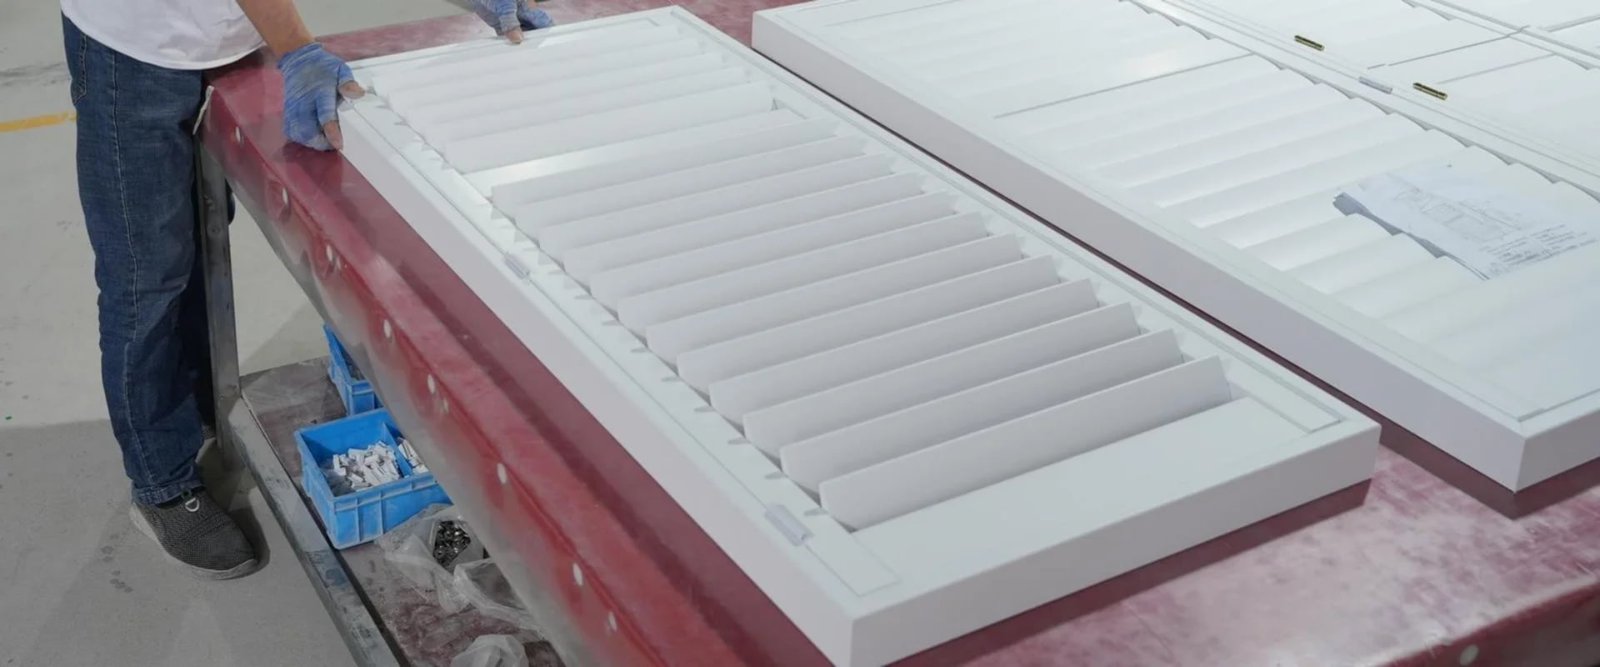
Step 4: Surface Finishing — Priming, Sanding, and Topcoat
The finish is what your customers see and touch every day. It's also where the largest quality differences between factories are found.
Our finishing line operates in a temperature-controlled spray booth maintained at 23°C and below 55% relative humidity year-round. Paint applied in high humidity cures more slowly, produces a softer film, and is more prone to blocking — where stacked panels stick together in packaging. Controlling the environment is non-negotiable.
The full finishing sequence for our standard premium painted shutters:
- Sealer coat — A penetrating sealer consolidates the wood surface and prevents uneven topcoat absorption.
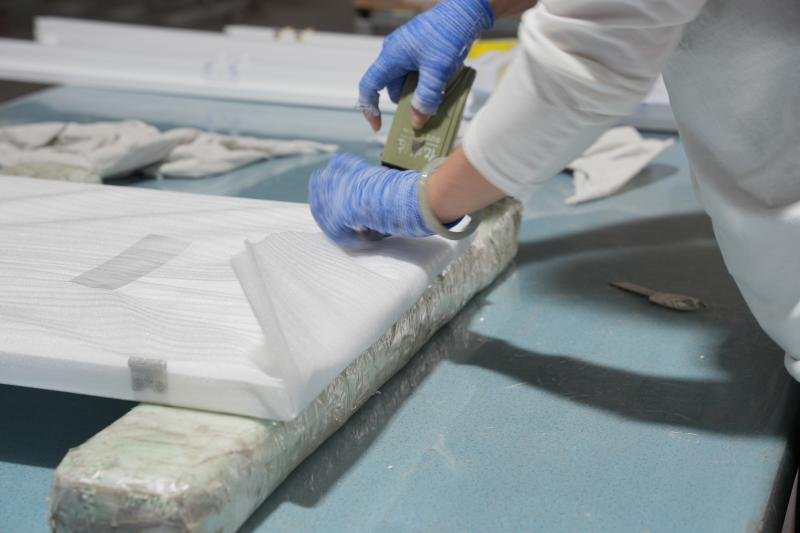
- First hand sand (180 grit) — Every panel is hand-sanded at this stage. Machine sanders cause micro-swirl marks that telegraph through the final coat under direct light.
- UV primer coat — We apply a UV-stable, anti-yellowing primer formulated specifically for Australian sun exposure. This is a core reason we can offer a lifetime warranty on our painted finish.
- Second hand sand (240 grit) — Removes any primer raised grain or dust nibs before topcoat.
- Topcoat (two passes) — Applied through our automated spray line. Two passes are standard on all premium grade panels.
- UV curing tunnel — Panels travel through at 4.5 metres per minute, locking the topcoat to 2H pencil hardness within seconds.
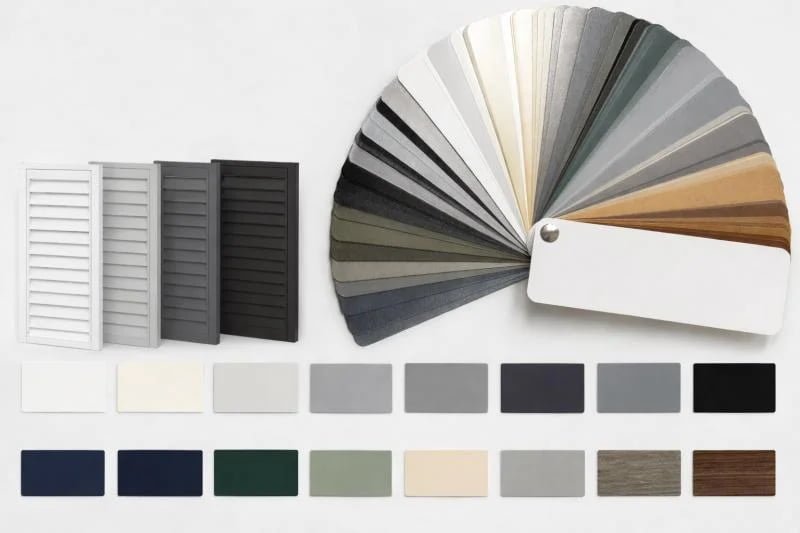
For custom colours, we work to RAL and NCS standards. Our colour lab holds 340+ matched formulas on file, allowing us to match a returning customer's custom colour batch-to-batch up to 24 months after the original order.
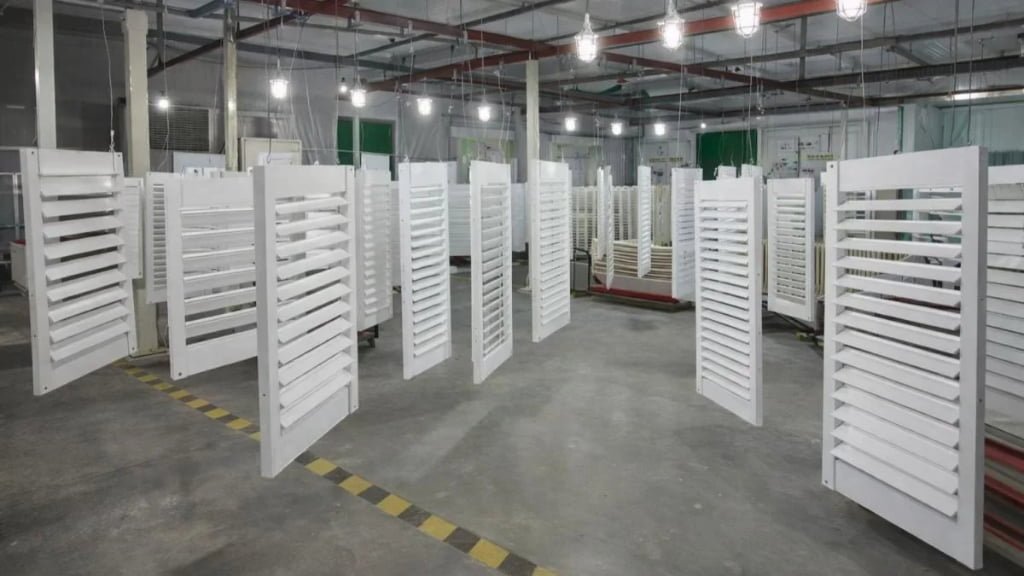
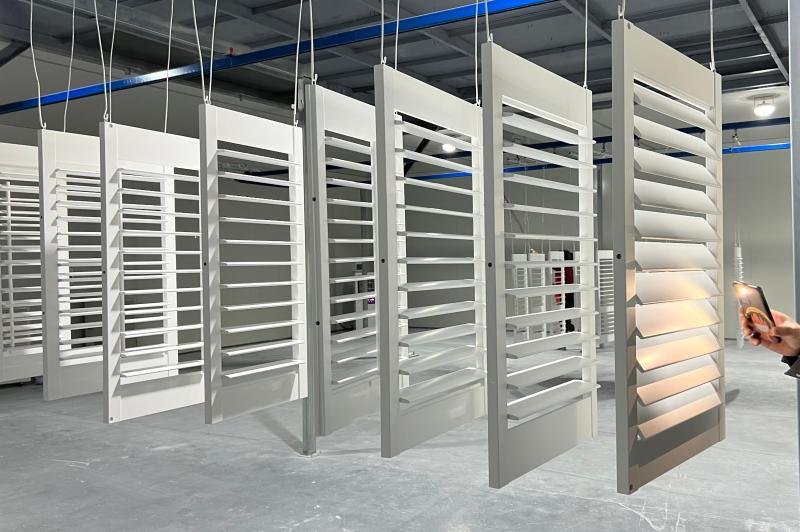
Step 5: Final Inspection and Export Packaging
No panel leaves our factory without passing a 100% final inspection — not sampling, not spot-checking. Every single panel.
Our FQC team of 48 inspectors checks each panel against a 12-point checklist:
- Louvre operation — opens and closes without resistance
- Tilt rod function — smooth full-range rotation, 0° to 170°
- Frame squareness — diagonal tolerance ≤1.5mm
- Surface finish — no runs, sags, dry spray, scratches, or holidays
- Colour consistency across the batch
- Hardware completeness — all hinges, pins, and fasteners present
- Dimensional accuracy — height and width within ±1mm
- Louvre pitch — all louvres at equal intervals across the panel
- Panel weight — within specification range for the declared material
- Marking and labelling — product code, colour code, size all verified
- Packaging integrity — foam wrap, carton condition, strapping
- Barcode scan — each panel logged to our traceability system
Our FQC defect rate in 2024 was 0.38%. Panels that fail are pulled from the batch, repaired or remade, and re-inspected before shipment.
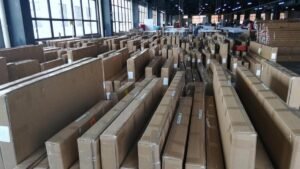
Export packaging for sea freight: Individual panels wrapped in PE foam sheet, panel pairs interleaved to prevent surface contact, corrugated outer carton with double-wall construction, carton strapping, palletised with corner protectors and stretch wrap. A standard 20GP container holds approximately 900 to 1,100 panels depending on size mix.
We photograph every loaded container before sealing and share the images with you before it sails — so you can see exactly what's inside your shipment before it leaves our gate.
From Timber to Your Container
That is the complete journey — timber selection, CNC milling, frame assembly, surface finishing, and final inspection — before a plantation shutter reaches your container.
We have walked you through this process because we believe you should know exactly what you are buying. Quality is determined at every one of these stages: the moisture threshold enforced at IQC, the tolerance held on the CNC, the number of finishing coats applied, the inspection standard enforced at FQC. There are no shortcuts in a product your customers install in their homes and expect to last a lifetime.
If you are an Australian or New Zealand distributor evaluating suppliers, we would like to show you more — including our current product range, factory-direct pricing, and 25 to 35 day lead time commitments.
Ready to discuss your first container order? Contact us here or request our wholesale catalogue to get started.
Published by Bright Shutters | Factory-direct plantation shutters for AU/NZ distributors